Sign up to view this video
Join Now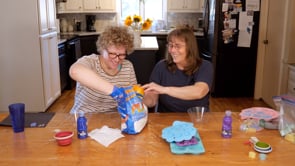
Making Sidewalk Chalk
About This Video
In this craft activity, Risa and Amanda show participants how to make homemade sidewalk chalk.
The video begins by gathering the main supplies, including tempera paint, plaster of Paris or plaster of pottery, water, disposable bowls, spoons, gloves, and molds. Risa explains that tempera paint is important for this project and that acrylic or watercolor paint should not be used for this recipe.
Participants follow along as Amanda measures plaster, adds water, and mixes until most of the lumps are gone. Then they add tempera paint to create color. Risa explains that more paint can make a stronger color, but it may also make the chalk take longer to dry.
After mixing, participants spoon the chalk mixture into molds, tap the molds to release air bubbles, and let the chalk set. Smaller molds may dry faster, while larger molds may need about 24 hours or more. The video also shows finished chalk being removed from the molds and tested outside.
This video gives participants a hands-on craft activity focused on measuring, mixing, color, molds, patience, drying time, outdoor play, and making something useful from simple materials.
Supplies Needed
Tempera paint
Plaster of Paris or plaster of pottery
Water
Disposable bowls
Spoons
Measuring cups
Molds, such as silicone molds or small shaped molds
Gloves, optional
Paper towels
Table covering or protected work surface
Plastic bag or container for storing finished chalk
Good For
Adults with IDD who enjoy crafts, color mixing, outdoor activities, sidewalk chalk, measuring, pouring, molds, or making something by hand.
Caregivers looking for a hands-on craft activity with simple materials, flexible measuring, and a finished item participants can use outside.
Adult day programs, home routines, or group activities about crafts, color, measuring, mixing, patience, outdoor play, creative expression, and following directions.
Participants who benefit from visual modeling, repeated steps, sensory materials, color choices, and a project that can be completed in stages.
How to Use This Video
Use this video as a guided craft activity for a home routine, day program, small group, or supported craft session.
Caregivers can help participants gather plaster, tempera paint, water, disposable bowls, spoons, molds, gloves, paper towels, and a protected work surface. Participants can help measure, pour, stir, choose colors, spoon the mixture into molds, and tap the molds to help remove air bubbles.
This activity happens in stages. Participants can make the chalk first, let it dry for about 24 hours or longer depending on the mold size and paint amount, then return later to remove the chalk from the molds and try it outside.
Because this activity involves plaster, paint, water, molds, possible mess, drying time, and outdoor use, caregivers should provide support with setup, material safety, measuring, mixing, cleanup, drying, storage, and reminders not to eat the chalk or craft materials.
At the end, participants can test the chalk outside, name the colors or shapes they made, draw a picture, write a message, or store the chalk in a bag or container for another day.