Sign up to view this video
Join Now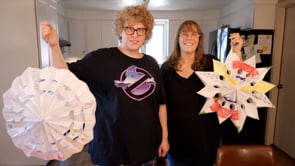
Paper Bag Decorations
About This Video
In this craft activity, Issa and Amanda show participants how to make a hanging star or flower decoration from paper bags.
The video begins by gathering supplies, including seven to ten paper bags, glue, scissors, markers, a single hole punch, and string or yarn for hanging. Issa explains that white paper bags can be customized with color, while brown paper bags can create a more rustic look.
Participants learn how to choose a pattern for the top and sides of the bags. Issa demonstrates how different cuts can create different final shapes, including pointed stars, rounded flowers, triangle or diamond cutouts, and oval or circle shapes. She reminds participants not to cut off the sides or bottoms of the bags because those parts help hold the decoration together.
After cutting, participants decorate the bags with markers, crayons, pencils, stickers, or other supplies. Issa explains which parts of the bag will show most when the decoration opens, then demonstrates how to stack the bags in the same direction and glue them together using a large T-shaped line of glue.
Once the bags are glued together, participants open the stack into a star or flower shape, glue the final sides together, pinch the edge while it dries, punch a hole, and add string for hanging. This video gives participants a hands-on craft activity focused on paper bags, cutting, pattern, color, gluing, sequencing, patience, and making a decorative piece to display or give as a gift.
Supplies Needed
Seven to ten paper bags, white, brown, or another color
Glue
Scissors
Markers, crayons, pencils, pens, or stickers
Single hole punch
String, yarn, twine, paperclip, or another hanging material
Optional: cardboard, newspaper, or extra paper to prevent markers from bleeding through
Good For
Adults with IDD who enjoy crafts, paper projects, decorating, cutting, gluing, patterns, hanging decorations, or making something by hand.
Caregivers looking for a guided craft activity with simple materials, flexible designs, and a finished decoration participants can display or give to someone else.
Adult day programs, home routines, or group activities about crafts, color, pattern, paper construction, sequencing, decorating, creative expression, and gift-making.
Participants who benefit from visual modeling, repeated steps, color choices, flexible pacing, and encouragement to experiment with their own design.
How to Use This Video
Use this video as a guided craft activity for a home routine, day program, small group, or supported craft session.
Caregivers can help participants gather paper bags, scissors, glue, coloring materials, a hole punch, and string. Participants can choose whether they want to make a pointed star, rounded flower, or another shape based on the cuts they make.
This video can be paused often while participants draw a cutting pattern, cut the bags, decorate the visible areas, stack the bags in the same direction, glue each bag with a T-shaped glue line, open the shape, glue the final sides together, punch a hole, and add string for hanging.
This activity can be adjusted in many ways. Participants can use pre-cut bags, fewer decorations, larger paper bags, caregiver help with cutting, or prepared patterns if they need more support. They can also choose colors that match a bedroom, classroom, holiday, event, or gift recipient.
Because this activity involves scissors, glue, hole punching, folded paper bags, string, and repeated steps, caregivers should provide support with setup, cutting safety, gluing, hole punching, knotting, pacing, cleanup, and any needed visual or hands-on assistance.
At the end, participants can hang their paper bag star or flower, name the colors and shapes they used, give it as a gift, or make another version with a different pattern.